Starting from version 3.0.5, you can configure a general Microsoft email using OAuth2, to do this on your WPSCRM installation follow the steps below, note that you will need to create an Azure application and authorize it in the WPSCRM email configuration section at Setup -> Settings-> Email
Notes
- New App Registration Requirement: As of the update, personal Microsoft accounts (e.g., @outlook.com, @hotmail.com) cannot register apps outside of a directory. Ensure you are working within an AAD tenant.
- OAuth Consent: Users may need to authorize your app the first time they use it.
For more detailed information, refer to Microsoft Documentation.
Steps
1. Register an Application in Azure Active Directory
- Log in to the Azure Portal: https://portal.azure.com.
- Navigate to Azure Active Directory > App Registrations.
- Click + New Registration.
- Provide:
- Name: Enter a recognizable name (e.g., WPSCRM Email Integration).
- Select who should be able to use this application:
- Supported Account Types: Select who should be able to use this application:
- Accounts in this organizational directory only (Single tenant) for internal use.
- Accounts in any organizational directory (Multi-tenant) if you want to support other AAD tenants.
- If you are not sure about this option, select: Accounts in any organizational directory (Any Microsoft Entra ID tenant – Multitenant) and personal Microsoft accounts (e.g. Skype, Xbox)
- Redirect URI: Enter https://wps-crm-url.com/admin/smtp_oauth_microsoft/token.
- Ensure to replace wps-crm-url.com with your WPSCRM installation.
- Ensure Web is select in the redirect URI dropdown.
- Click Register.
2. Configure API Permissions
- Go to API Permissions in your app’s settings (Manage -> Certificates & secrets).
- Click + Add a permission.
- Select Microsoft Graph > Delegated permissions.

- Add the following permissions:
- offline_access
- SMTP.Send
- (Optional) If admin consent is required, click Grant admin consent and confirm.
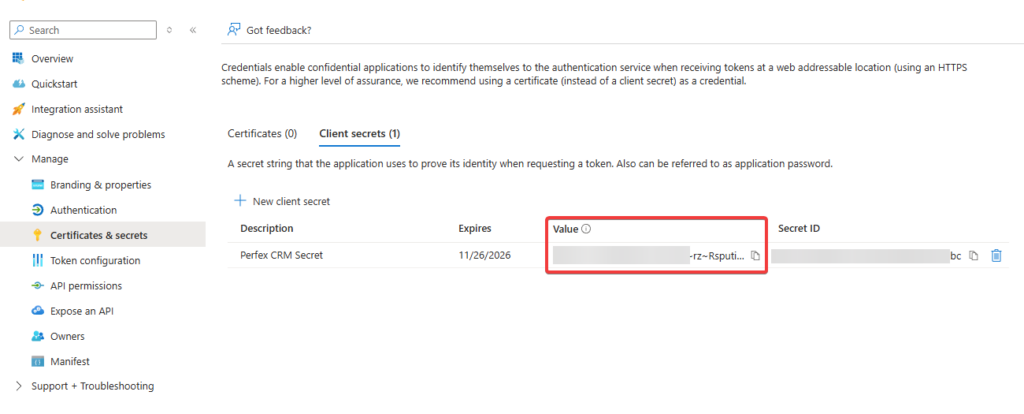
3. Set Up Secret
- In your app, go to Certificates & secrets (Manage -> Certificates & secrets).
- Click + New client secret.
- Add a description (e.g., WPSCRM Secret) and choose an expiration period.
- Click Add and copy the Value. This is your Client Secret.
4. Note Key Details
Save the following information for WPSCRM configuration:
- Application (client) ID: Found on the app’s Overview page.
- Directory (tenant) ID (if applicable): Found on the app’s Overview page.
- Client Secret: Copied from the previous step.
5. Enable Email Sending in WPSCRM
- Log in to WPSCRM.
- Navigate to Setup -> Settings -> Email.
- Select Microsoft Azure XOAUTH2 as the email protocol.
- Ensure Mail Engine is set to PHPMailer.
- Ensure the Email Protocol is set to Microsoft OAuth 2.0.
- Enter the following:
- Client ID: Your Application (client) ID.
- Client Secret: Your Client Secret.
- Tenant ID: Your Directory (tenant) ID (if applicable).
- SMTP Host: smtp.office365.com.
- SMTP Port: 587.
- Encryption: TLS.
- Email: The e-mail address you will use to send emails from WPSCRM, usually this is the e-mail address associated with the Azure application.