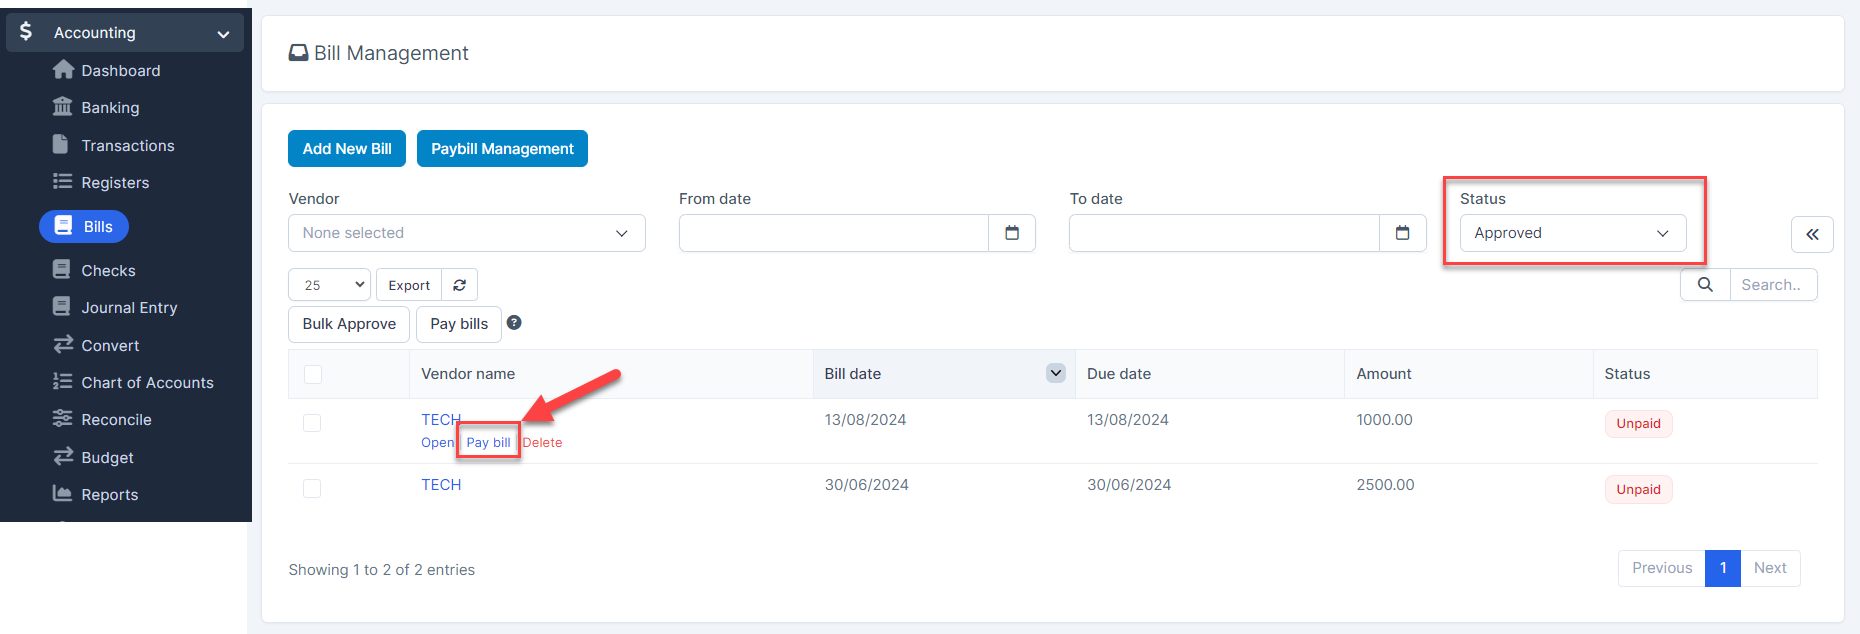
- Step 1: Go to Bills menu-> Filter Status by Approved
- Step 2: Hover over the bill you want to pay and click Pay bill
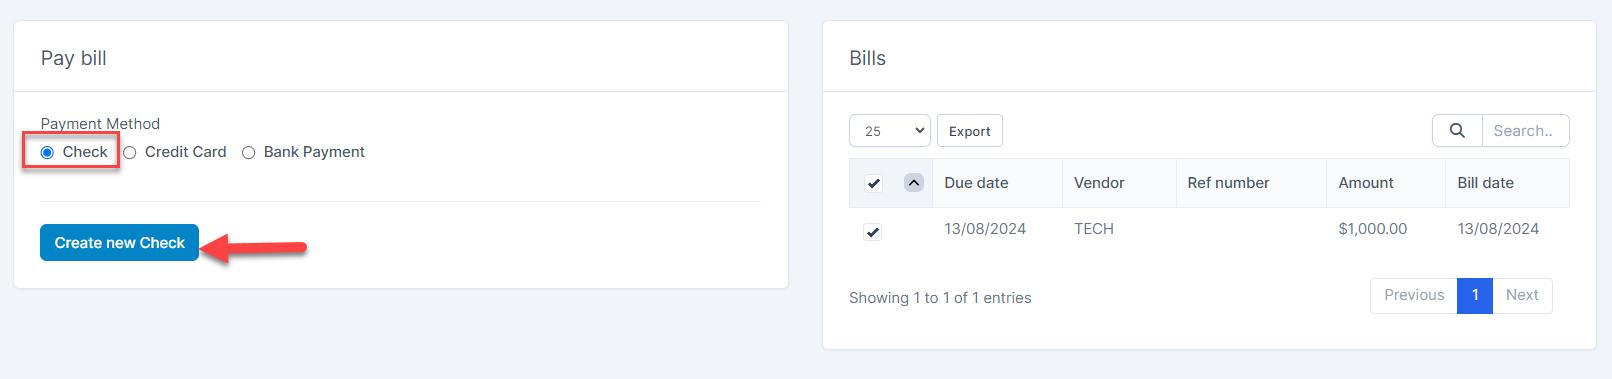
Step 3. On the Pay bill form, choose Check and click on the Create new Check button
Step 4. The system redirect to the Write Checks First, select "Configuration" to select the information to hide/show on the check
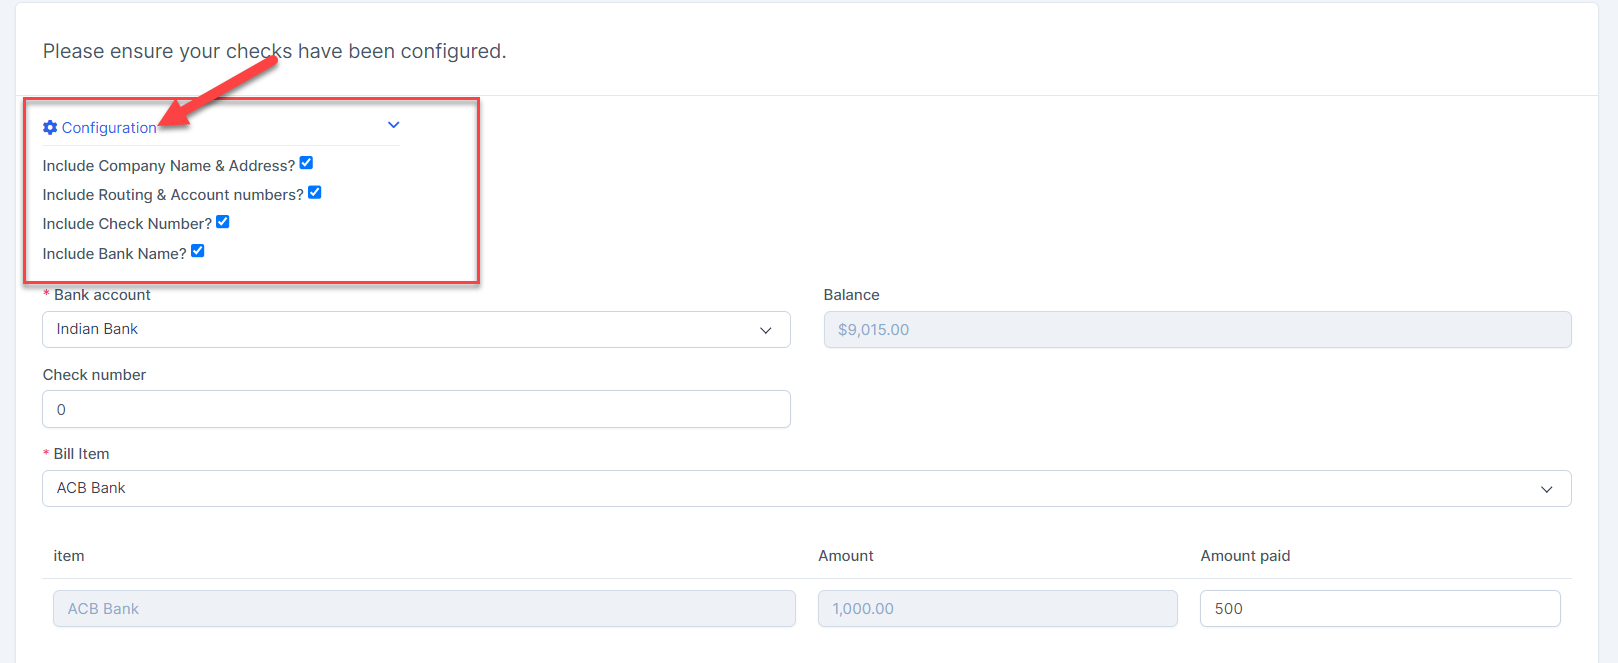
Secondly, select Bank account, the system automatically displays the next check number of the selected bank account, default starts with 0. Then select Bill Item and enter the total amount paid in Amount paid field
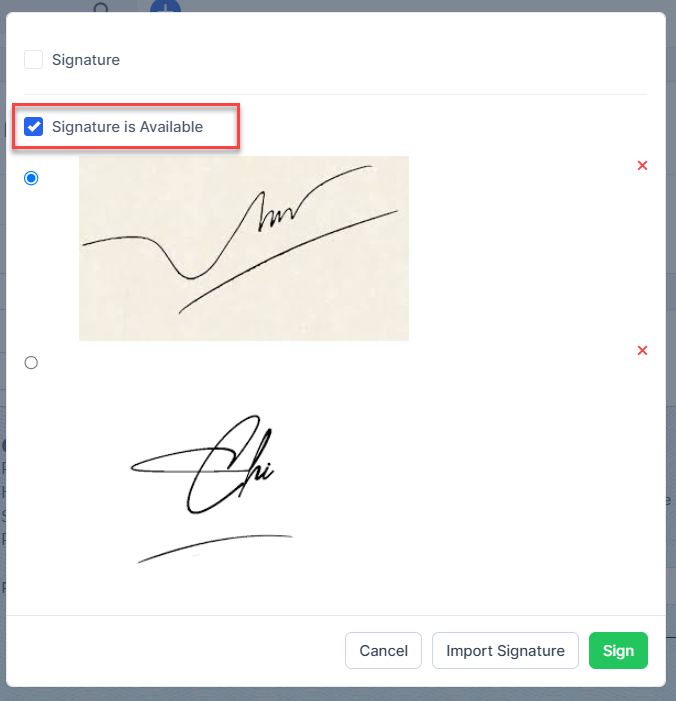
Step 5. Sign Click the Sign button -> the system displays a popup to sign.

Note: The condition for displaying the Sign button is that "Show 2 Signatures" in Configure Checks is not enabled.
- Check “Signature” to draw signature directly -> Then press SIGN

Or check “Signature is Available” -> Click Import Signature button to insert signature image -> Then select the signature and pressSign
- Step 6. Save this check and print, you can see details print options at https://wpscrm.com/knowledge-base/article/pay-bill-with-check